Can I Just Paint My Garage Floor From The Get Go?
Yes, you can paint your garage floor, but prep matters. Start by cleaning thoroughly to remove oil and dirt, degrease, rinse, and dry completely. Repair cracks, scuff the surface, and mask edges for clean lines. Choose a finish like epoxy for durability, or stain/latex if you want easier application. Follow the manufacturer’s prep and curing times, apply in good conditions, and seal as needed. If you keep going, you’ll uncover tips to get the best long-lasting result.
Can I Actually Paint a Garage Floor Safely?
Yes, you can paint a garage floor safely, but preparation sets the finish up for success. Before you mix, clean, and degrease, remove oil spots and dust so the coating bonds properly. Ventilate the space and wear a respirator if you’re spraying.
Choose a low-VOC product and follow the label for curing times. Mask edges and any drains to keep lines crisp. Stir thoroughly, apply thin, even coats, and avoid pooling by maintaining a steady pace.
Monitor drying conditions—temperature and humidity matter for adhesion. If you want options beyond traditional paint, consider paint alternatives like epoxy-like coatings or decorative sealers.
For overall garage aesthetics, plan color and finish that reduce glare and simplify maintenance. Use these methods to protect concrete effectively and keep the floor looking purposeful.
What Finish Options Work Best for Concrete Floors: Epoxy, Stain, or Latex?
When you’re choosing finishes, weigh epoxy’s durability and chemical resistance against a stain’s color versatility and latex’s easier repair and application.
Epoxy offers strong longevity but can be tricky to apply and requires proper surface prep, while stain adds color with less buildup and latex keeps installation simple.
This discussion focuses on balancing long-term performance with ease of use to match your garage’s needs.


Epoxy Advantages and Limits
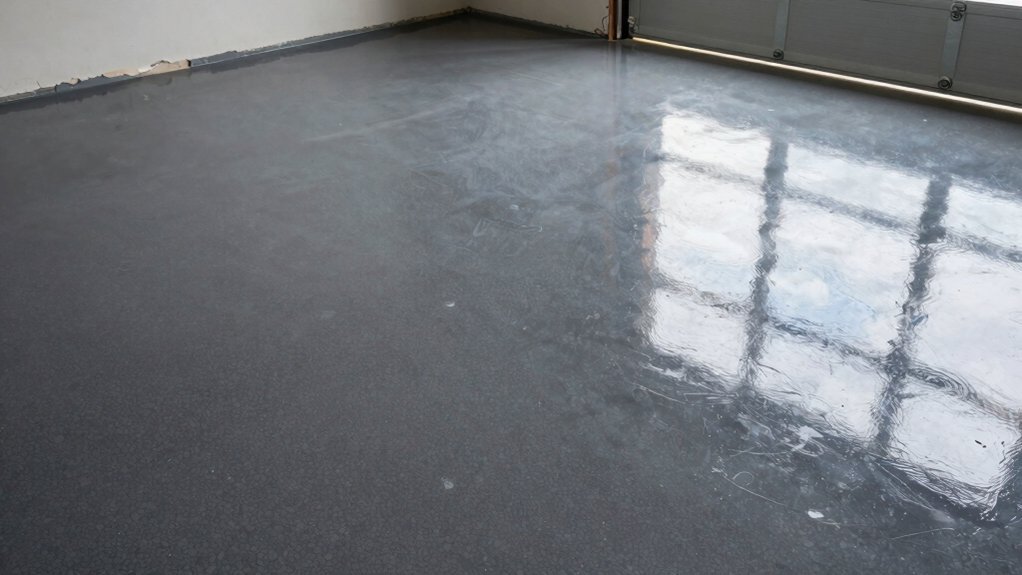
Epoxy finishes offer durability and a high-gloss look that’s easy to sanitize, but they aren’t a perfect fit for every garage. You’ll get strong chemical resistance and stain tolerance when you apply it correctly, yet surface prep matters most: remove oil, repair cracks, and etch or profile the concrete.
The protection lasts, but you can’t ignore maintenance—hot tires, UV exposure, and heavy loads can cause chipping or yellowing over time. Work with a reputable kit and follow mixed ratios precisely to avoid soft or sticky spots.
Consider color options that resist fading, since sun exposure matters. Assess environmental impact: some epoxy systems use solvent-based formulations, others low-VOC.
If you need easy repairs or rapid turnarounds, epoxy is strong, but plan for proper curing and ventilation.
Stain vs Latex Prospects
Stains and latex finishes offer practical alternatives to epoxy, each with distinct looks, durability, and maintenance needs for concrete floors. You’ll weigh color options and how they hide or reveal texture, then decide based on use and traffic.
Latex coatings dry quickly, clean easily, and resist peeling if you apply proper prep, but they may not last as long as epoxy in high-traffic areas.
Stains penetrate to create subtle tones and irregular shading; they’re superb for a natural stone or custom look, yet can require sealing to protect from moisture. Color options range from earthy hues to bold accents, so visual impact matters.
Cost considerations include product price, prep, and potential reapplications; plan for occasional refreshes or a broader repaint interval. Choose the finish that aligns with your maintenance tolerance and floor use.
Do I Need Primer or Sealant Before Painting?
Before you paint, you’ll want solid surface prep: clear debris, repair cracks, and dampen the area as needed.
Primer, if used, boosts adhesion and color evenness, so I’ll explain when it’s essential and when it’s optional.
Sealant benefits come into play for moisture control and longevity, so we’ll cover how to decide if you need it for your garage floor.
Surface Prep Essentials
If you’re painting a garage floor, you’ll want to start with solid surface prep: clean, repair, and decide on primer or sealant based on the surface condition and the paint system you’ll use.
Begin with a thorough cleaning to remove oils and dust; degrease spots, then rinse and dry completely.
Inspect for cracks, chips, or flaking coating; fill and sand to a smooth, uniform area.
Decide on primer or sealant based on porosity and previous coatings, then apply as directed.
For color selection, choose a finish that stands up to wear and cleaning.
Guarantee adequate ventilation needs are met during application and curing, especially in enclosed garages.
Finally, test a small area to confirm adhesion before full coverage.


Primer Necessity Explained
Primer can make or break your DIY garage paint job, especially on porous concrete or surfaces with prior coatings. You’ll decide whether primer or sealant fits your project, then proceed with confidence.
- Evaluate surface: porous or smooth? Porous needs primer; slick coatings may require a bonding primer.
- Pick a primer type: acrylic for concrete, epoxy for heavy wear. Follow label for dry times.
- Plan color and budget: choose color options early, and align primer cost with budget considerations.
Color selection and budget considerations drive your choices, so document intended shades and total costs before you buy. Primer isn’t optional if you want consistent color fade resistance and adhesion; skipping it can lead to peeling and uneven finishes.
Sealant Benefits Overview
Sealant adds a protective, water-resistant layer that helps your paint last longer on concrete surfaces. You benefit from fewer water stains, reduced chipping, and a tougher finished floor.
Before choosing a sealant, assess your concrete condition and traffic level, then pick a product designed for garage use. Apply as directed, usually after concrete cure and cleaning, ensuring a clean, dry surface.
Sealants vary in flexibility, chemical resistance, and compatibility with paints, so verify you’ll still achieve a solid color and shine. Consider color options that complement your space, as some seals alter tint. Do a small test area if uncertain.
Do a quick cost analysis to compare coverage, durability, and maintenance needs against alternatives. This helps you decide if sealant before painting fits your budget and goals.
How to Prep Your Concrete Surface for Paint
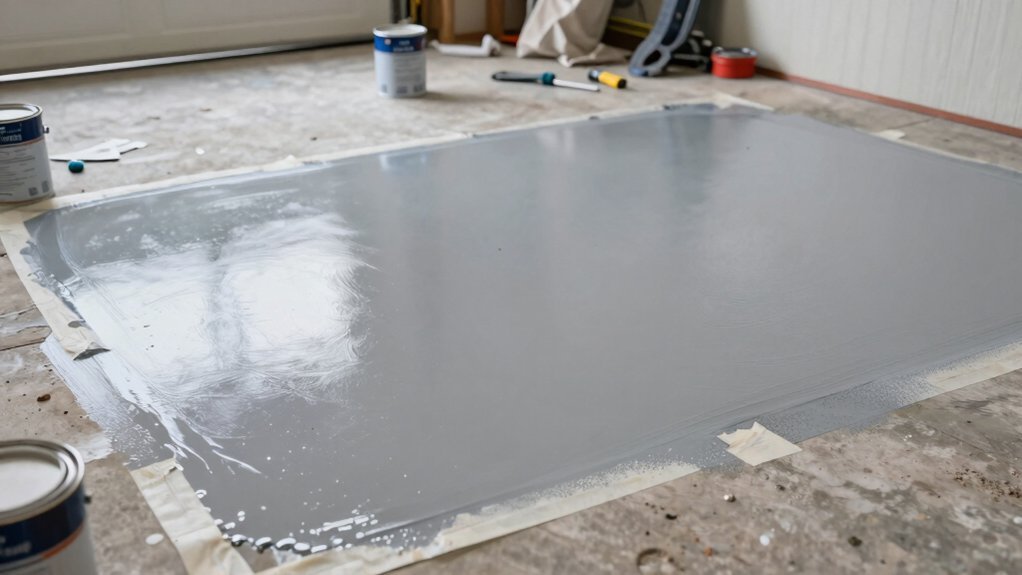
To prep a concrete floor for paint, start by cleaning the surface thoroughly to remove dust, dirt, oil, and grease. Then follow these steps:
- Degrease and rinse to vanish oily residues, ensuring a neutral clean.
- Scuff the floor with a stiff brush or grinder to create profile for adhesion.
- Vacuum and wipe down, letting the surface dry completely.
While you work, consider garage ventilation to manage fumes and dry times. If you notice stubborn stains, treat them separately with an appropriate cleaner. After cleaning, inspect for cracks and repair as needed.
This prep also reduces the chance you’ll see patchy spots after painting. Keep concrete staining options in mind for future projects, but hold off until the floor is fully prepped and dry. Your goal is a smooth, clean, porous surface ready for paint.
Choosing a Garage Floor Finish: Pros, Cons, and Use Cases
You’ll compare finishes by weighing pros and cons, so you pick what lasts and looks right for your space. Consider use case scenarios—garage traffic, chemicals, and heat—and how each finish handles them.
Then review application considerations like prep, cure time, and maintenance to choose confidently.
Pros and Cons
When choosing a garage floor finish, it’s essential to weigh the pros and cons of each option and consider how you’ll use the space. You’ll need to balance durability, maintenance, and cost as you decide what fits your needs.
To help you compare, consider these points:
- Pros: improved durability, easier cleaning, and better safety with non-slip surfaces.
- Cons: higher upfront costs, longer install times, and potential odor during curing.
- Use-case alignment: select a finish that tolerates chemicals, spills, and vehicle traffic without sacrificing aesthetics.
Think about garage aesthetics and cost implications when you plan, since looks matter and long-term value matters.
If you value quick downtime, a simpler, lower-cost coating may suit you.
If you prioritize longevity, invest upfront for a high-performance finish.
Use Case Scenarios
Choosing the right garage floor finish hinges on how you’ll use the space day to day. In use case scenarios, you design around practicality and durability, not just appearance.
If you park heavy vehicles, opt for a hard-wearing epoxy or polyaspartic coating that resists wear and chemical spills. For hobbyists who stain, groove, or weld, consider a gloss or satin finish that’s easy to clean and resists fumes.
If you store equipment, plan for seamless epoxy with minimal seams to prevent dirt buildup. For frequent foot traffic, a slip-resistant additive can boost safety without sacrificing ease of cleaning.
Also map out Garage lighting and storage solutions to avoid shadows and misplacement. Match your finish to your workflow, then maintain with regular sweeping and occasional re-coating.


Application Considerations
Application considerations start with clarity about your space and goals. You’ll choose a finish by evaluating foot traffic, chemical exposure, and maintenance needs, then confirm your budget and timeline. Here are core steps to guide you:
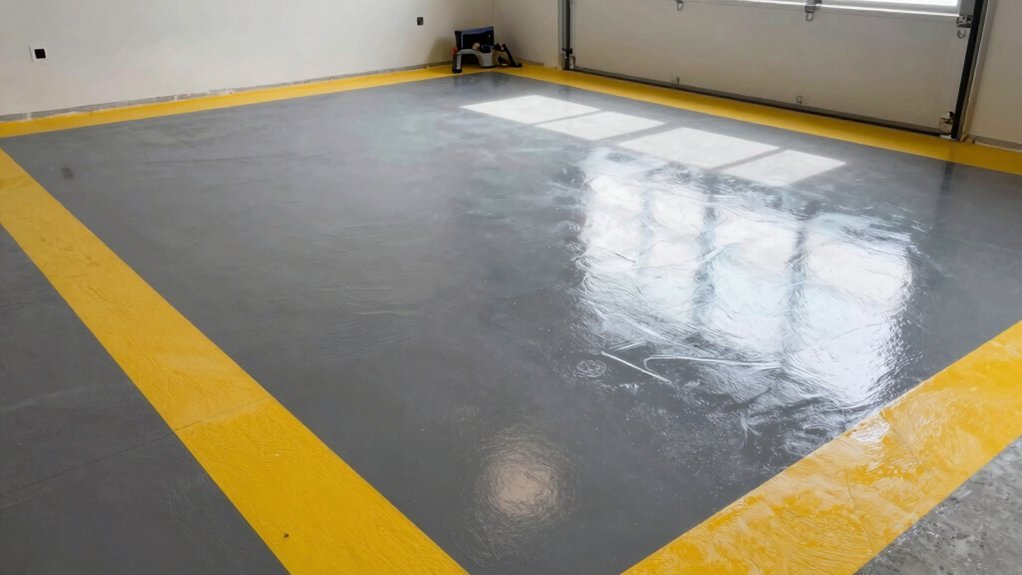
- color selection: pick a hue that hides dirt and schedules easily with your lighting and wall color.
- tool requirements: verify you have proper brushes, rollers, a floor squeegee, masking tape, and a compatible cleaner.
- surface prep: verify the concrete is clean, dry, and crack-free, and decide if etching or profiling is needed before coating.
Following these steps helps you avoid premature wear and facilitates even coverage, quicker curing, and dependable protection for years to come.
Durability, Maintenance, and Routine Care After Painting
After painting, the floor’s durability hinges on proper curing and routine care: start by letting the coating fully cure per the manufacturer’s guidelines, then protect it from heavy traffic until it’s hard enough to withstand daily use.
You’ll extend life by cleaning spills promptly and avoiding harsh solvents that could degrade the finish. Use a mild detergent and a soft mop for routine maintenance, and reseal lightly if you notice dulling or minor abrasions.
Schedule re-coats only when the current layer shows wear, following product instructions. Consider color options that hide wear better between maintenance cycles, and weigh the environmental impact of materials before choosing products.
Keep mats at entry points and use felt pads under heavy furniture to minimize scratching and preserve long-term durability.
DIY vs. Professional Application: When to Hire Help
There are clear moments when DIY makes sense and times when hiring a pro saves you time and headaches. When you’re confident with basic prep, a simple epoxy kit, and a small, flat area, you can tackle it yourself. But if you’ve got heavy traffic, stains, or concrete irregularities, bring in a pro to guarantee durability and even coverage.
- Assess surface and repairs
- Decide on epoxy vs. stain and your paint color selection beforehand
- Schedule expert application for consistent finish and long life
If you DIY, plan for garage organization during prep to avoid clutter. If you hire out, confirm timelines, warranties, and cleanup. Either way, you’ll end with a professional look and cleaner, safer floors.
Common Mistakes to Avoid When Painting a Garage Floor
Common garage-floor painting mistakes can derail a project fast, so skip hesitation and plan ahead. You’ll avoid most woes by prepping thoroughly: clean, degrease, and dry the surface, then remove flaky concrete. Don’t skip patching cracks or uneven areas; a smooth base prevents peeling. Choose your color options before you start, and test a small area to confirm adhesion and sheen. Don’t rush coats; apply thin, even layers and let each dry fully to prevent bubbling.
Mind environmental impact by using low-VOC products and ventilating well; avoid costly re-dos from fumes or improper curing. Don’t ignore humidity or temperature guidelines, or you’ll trap moisture. Finally, seal gaps and edges to reduce wear and edge peeling later on.
How to Extend the Life of Your Coating: Topcoats and Safety Tips
A solid topcoat can dramatically extend your garage floor’s life, so choose it wisely and apply it correctly. You’ll protect against wear, chemicals, and UV exposure while keeping maintenance simple.
- Select your topcoat with color selection in mind, prioritizing compatibility with the base coat and foot traffic.
- Apply in thin, even layers, allowing full cure between coats to maximize durability and reduce peeling risk.
- Consider environmental impact by opting for low-VOC formulations and proper disposal of tools and solvents.
Tip: Store products sealed, ventilate work area, and wear a respirator for fumes. Proper topcoat care minimizes repairs, preserves gloss, and helps you maintain a safe, appearing floor for years.
Is Painting Your Garage Floor Worth It for Your Space?
Painting your garage floor can be worth it when you want a cleaner look, easier maintenance, and better protection against spills. You’ll invest time into prepping, choosing a durable coating, and applying it evenly, but the payoff is a surface that’s easier to sweep and wipe down.
If you use a UV-resistant epoxy or polyaspartic formula, you’ll also reduce staining and odors from fuels or solvents. Consider how long you’ll stay in the space and how often you’ll host projects, because those factors drive value.
Do a quick cost analysis: material, tools, and potential professional help versus replacing mats or repainting every few years. For garage aesthetics, a smooth, uniform finish matters as much as practicality.
Frequently Asked Questions
How Long Does a Painted Garage Floor Last Realistically?
A painted garage floor realistically lasts 3–7 years with proper prep and sealant. You’ll boost garage durability by cleaning, etching, and using moisture barriers; pick paint color options that hide wear, then recoat every few years.
Can I Paint Over Existing Epoxy or Sealer?
You can’t unless you remove epoxy or sealer first; allegorically, you must strip old armor to suit a fresh coat. Do epoxy removal, test sealer compatibility, clean thoroughly, then seal before applying your new paint.
Is Garage Floor Paint Resistant to Chemical Spills?
Yes, garage floor paint can offer chemical resistance and spill protection, but choose a high-solids epoxy or urethane coating rated for chemicals; prepare the surface properly, apply primer, follow cure times, and maintain with regular cleanups.
What Ventilation Is Required During Painting?
Ventilation requirements require you to open doors and run fans, clearing fumes. You might think it’s fine otherwise, but follow safety precautions: wear a respirator, avoid sparks, and ventilate thoroughly while you’re painting the garage floor.
Can I DIY After Winter Storage or Only in Good Weather?
Yes, you can DIY after winter storage, but wait for mild temps. Do winter prep first, then apply paint and monitor curing; guarantee proper ventilation during curing and avoid heavy use until the coating fully sets.
Conclusion
You stand at the door to your garage, a plain concrete island yearning for armor. Imagine a coat of armor, bold epoxy gleaming like wet stone, or a cautious seal that whispers protection. Prep is your forge, paint your oath, and the finish your shield. If you neglect the steps, cracks will gossip and chips will betray you. Do it right, stay practical, and your floor becomes reliable armor you’ll trust every time you pull in or out.