To prepare a garage floor for painting, first assess its condition for cracks, spalling, and oil saturation, then map the problem areas. Clean thoroughly by degreasing first, scrubbing in sections, rinsing, and allowing complete dry time. Repair cracks with appropriate epoxy or polyurethane injections and smooth any surface irregularities. Profile the surface via mechanical or chemical etching to improve adhesion, then choose a compatible primer and coating. With proper sequencing, you’ll maximize durability and bond strength, and you’ll see why the steps matter.
Assess Garage Floor Condition: Cracks, Spalling, Oil Saturation

Evaluating the garage floor begins with identifying cracks, spalling, and oil saturation. You inspect the garage surface with a systematic approach, recording each defect type and location.
Cracks are measured for width, length, and pattern to determine movement potential; document hairline fractures versus structural gaps.
Spalling is assessed by surface depth, aggregate exposure, and delamination risk, noting affected zones and floor thickness variations.
Oil saturation is tested with absorbent material or a solvent-dampened pad to map staining extent and residue hardness.
Record substrate moisture indicators and ventilation conditions, as moisture mitigation considerations will drive repair feasibility.
You prioritize defects by severity, differentiating cosmetic from structural concerns, and plan appropriate remediation steps.
This assessment establishes a reliable baseline for subsequent preparation and coating decisions on the garage surface.
Clean and Degrease Thoroughly: Step-By-Step Degreasing Protocols
To begin, gather all necessary degreasing supplies and lay out a defined workflow to guarantee consistent results. You’ll start with a pre-clean: remove loose debris, then apply a compatible degreaser or solvent designed for concrete. Follow label directions for dilution, contact time, and temperature; maintain ventilation and wear gloves and eye protection.
Scrub using a stiff-bristle brush or low-speed machine, working in small, overlapping sections to lift oil stains without spreading contamination. Rinse thoroughly with clean water, collect effluent per local codes, and inspect for remaining slicks.
If residues persist, repeat the cycle or switch to a stronger degreaser, ensuring surfaces dry completely before applying Garage floor sealing. Document your process as Garage cleaning tips for future maintenance and compliance.
Repair Cracks and Surface Damage: Methods and Materials
You’ll assess crack repair techniques, selecting appropriate fillers and anchors to suit crack width and substrate.
Then you’ll apply surface smoothing methods to create a uniform plane, addressing spalls and rough edges before coating.
Finally, you’ll use a material selection guide to choose compatible products and proper curing times for lasting adhesion.
Crack Repair Techniques
Crack repair in a garage floor begins with identifying the crack type, width, and root cause, then selecting a repair method that restores structural integrity and provides a moisture barrier.
You assess active versus dormant cracks, determine isolation from movement, and choose materials accordingly. For narrow cracks, use epoxy injection or precision-filled epoxy paste to bond cracks and block water ingress.
For larger or shifting fissures, apply structural epoxy grout or urethane-based injections designed to accommodate substrate movement.
Surface preparation is critical: clean, dry, and profile the crack edge to improve adhesion, then mask surrounding concrete.
Cure times follow manufacturer guidance, and you verify full recovery with a pressure test or dye penetration check.
Consider epoxy formulations that support color customization while maintaining long-term performance.
End-state is a sealed, uniform substrate ready for subsequent coatings.
Surface Smoothing Methods
Surface smoothing after crack repair relies on controlled material selection and disciplined application to restore a uniform, ready-to-coat substrate. You assess remaining irregularities and categorize them by depth and size, then select appropriate smoothing strategies.
Begin by preparing the surface through thorough cleaning and dry profiling to ensure adhesion. For shallow defects, epoxy overlays provide precise fill and rapid cure with minimal shrinkage, while deeper hollows require back-filling followed by a leveling coat.
Apply materials in thin, successive passes, recording cure times between steps to prevent bonding faults. Post-application, verify planarity with a straightedge and resolve any high spots via very light sanding.
Surface etching may be employed to enhance profile if the substrate shows low porosity or poor cohesive strength. Conclude with a solvent-free cure and inspect for uniform gloss and edge-to-edge continuity.
Material Selection Guide
Material selection for repairing cracks and surface damage hinges on matching material properties to defect type, environmental exposure, and substrate condition. You assess crack width, movement, and substrate porosity, then pair repair products accordingly.
For concrete, choose epoxy or polyurethane fillers with appropriate cure times and adhesion to promote long‑term stability.
Surface damage like spalls or delaminations requires patch mortars or cement-based crowns that restore planarity before coating.
Compatibility with your topcoat is essential, ensuring Bond strength and moisture tolerance align with the selected lining.
Consider garage flooring options that minimize future cracking, and verify easy maintenance and cleanability.
When planning, factor paint color selection, ensuring that the repair system won’t alter finish hue or sheen unexpectedly.
Document compatibility data for future reference.
Etch or Profile for Adhesion: Mechanical vs Chemical Options
To guarantee proper adhesion, you must decide between mechanical or chemical etching to profile the concrete surface. You weigh adhesion goals, substrate condition, and safety implications before choices impact surface preparation.
Mechanical profiling removes laitance and creates micro-roughness through grinding or shot blasting, yielding predictable adhesion test results.
Chemical etching, when appropriate, reacts with minerals to roughen the surface without substantial material loss, but requires thorough rinsing and neutralization.
Consider moisture and curing state to avoid trapped moisture.
Don’t overlook tool wear, dust control, and respirator use.
Balance surface durability with paint compatibility by selecting the most consistent profile achievable under site constraints.
- Mechanical vs Chemical approach feasibility and safety
- Expected roughness and substrate condition outcomes
- Verification steps: cleaning, moisture check, adhesion test
Choose Primers and Paints for Garage Floors: Criteria and Options
Choosing primers and paints for a garage floor hinges on substrate condition, anticipated wear, and moisture exposure, so select products that bond well to the prepared concrete and tolerate vehicle traffic and spills.
In this section, you evaluate primer options based on adhesion, curing, and compatibility with chosen paint types. Prioritize concrete-compatible primers that seal porosity and suppress outgassing without trapping moisture.
For paints, select systems rated for friction and chemical resistance, and verify compatibility with primers to avoid delamination. Consider epoxy, polyaspartic, or urethane alternatives, noting that some primer options require specific surface profiles.
Inspect substrate cleanliness, humidity, and temperature constraints during application. Document cure times, recoat windows, and ventilation needs to ensure durable, uniform coverage aligned with anticipated use.
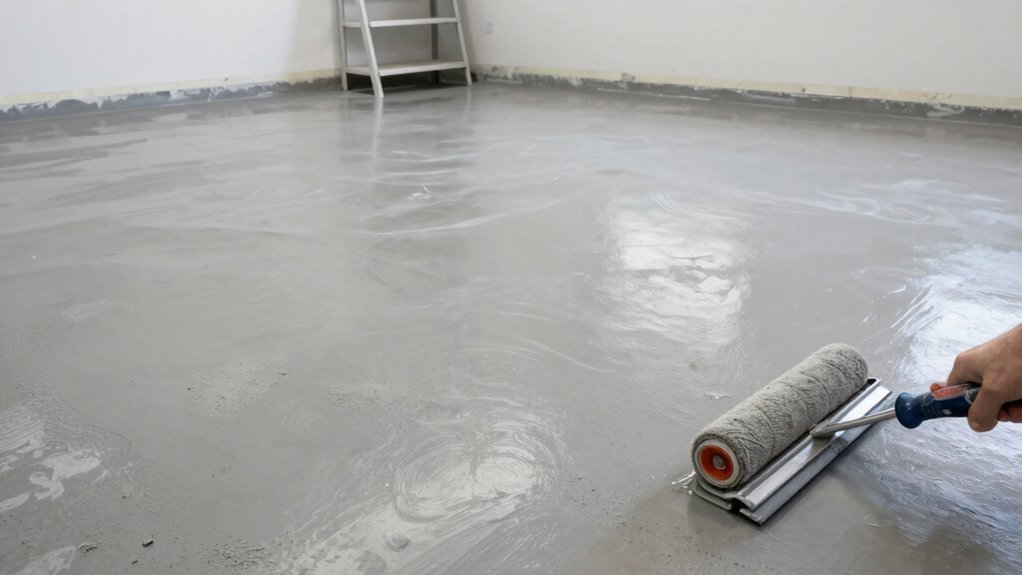
Apply Coatings for Durability: Layering, Dry Times, and Techniques
Now that you’ve selected primers and paints tuned for wear and moisture, you’ll implement coatings in deliberate, controlled steps to maximize durability. You apply coatings in measured layers, observing specified layering techniques to build barrier strength without trapping moisture. Maintain consistent coats, monitor cure times, and respect substrate temperature to avoid pinholes or blushing.
Adhere to recommended drying times between passes, using slow, even application to prevent roller marks. Document each layer’s thickness and elapsed time for quality control. Once cured, perform a light inspection before any loading or use.
- Establish target film thickness per coating and verify with a gauge.
- Slot each layer into the drying times window, spacing applications accordingly.
- Seal edges and junctions to prevent moisture ingress and wear channels.
Maintain and Recoat for Longevity: Inspection and Scheduling
Regular inspections and a scheduled recoat plan keep coatings performing at peak. You should establish a routine that logs cure times, ambient conditions, and any surface changes.
Inspect for gloss loss, blistering, or microcracks after heavy use and before recoat cycles. Confirm surface prep targets are met: clean, dry, and free of contaminants; repair pitting or concrete defects; and verify primer compatibility.
Create a recoat calendar aligned with coating manufacturer guidance, considering traffic, temperature, and humidity. Maintain garage organization to prevent debris ingress during inspections and application windows.
Plan lighting enhancement where you’ll work, ensuring uniform illumination to reveal imperfections. Document each cycle, capture environmental data, and adjust intervals to sustain durability without unnecessary downtime.
Frequently Asked Questions
How Long Until Foot Traffic Is Allowed After Painting?
Foot traffic should wait until the coating fully dries and cures; typically allow 24–72 hours for drying time, with a longer curing period up to seven days, depending on product specs and environmental conditions. Wear gloves; test before use.
Can I Paint Over Existing Epoxy or Laminate Floors?
Yes, you can, but you must prepare first. Garage floor prep involves scuffing, cleaning, and priming; epoxy overcoat adheres best. You’ll apply an epoxy overcoat after proper surface prep, ensuring compatibility and curing before light traffic resumes.
What Ventilation Is Required During the Painting Process?
Ventilation requirements depend on the epoxy or paint you use; guarantee continuous air exchange and avoid stagnant air. Open doors and use exhaust fans; wear respirators. Follow safety precautions, monitor fumes, and ventilate until odors dissipate completely.
Should I Remove Permanent Stains Before Priming?
Yes, you should remove permanent stains before priming. Perform stain removal with a weather- and chemical-resistant cleaner, scrub, and rinse. For surface preparation, dry thoroughly, etch or grind as needed, and guarantee a uniformly clean, sound base.
How Do I Prevent Peeling After Seasonal Temperature Changes?
You’ll reduce peeling by understanding that 30% of failures come from temperature fluctuations, so you’ll control them. Use proper surface preparation, then verify paint adhesion with a test area, choosing flexible coatings to withstand temperature fluctuations.
Conclusion
As you start, you’ll notice how the floor’s condition guides every step you take. You’ll clean, degrease, and rinse with deliberate precision, then repair and profile where needed. You’ll mix primers and coatings exactly, applying in defined layers with controlled dry times. You’ll inspect as you go, catching deviations before they become issues. You’ll finish with a tidy surface and a schedule for recoat. Coincidence nudges your sequence, yielding a durable, professional-grade garage floor.