Yes, painting your garage floor is worth it if you want durability, easier cleanup, and a safer space. A proper coating protects concrete from spills, stains, and wear, improves traction, and boosts curb appeal. Expect to invest in good surface prep, correct primer, and a suitable coating (epoxy, acrylic, or polyurethane) for your climate and use. Be aware of potential peeling or UV issues and plan for maintenance. If you keep watching, you’ll uncover exact prep steps and costs.
Should You Paint Your Garage Floor? A Quick Decision Framework
If you’re weighing whether to paint your garage floor, start with a quick decision framework: assess your goals, budget, and the condition of the existing concrete, then compare coating options, durability, and maintenance.
You’ll want a decision that balances function with appearance, so map how often you’ll use the space and what spills you’ll encounter. Do a straightforward cost analysis, including prep work, materials, and potential long-term upkeep.
Consider Garage aesthetics and how a durable finish fits your workflow, parking, and storage setup. From there, choose between epoxy, acrylic, or latex systems based on stain resistance and abrasion tolerance.
Narrow your choice to products with clear warranties and predictable maintenance, ensuring the result meets both practical needs and budget expectations.
The Main Benefits of Garage Floor Paint
You’ll get durability and longevity from garage floor paint, resisting wear from cars, tools, and spills.
The slip-resistant finish adds traction, reducing risk on wet or dusty surfaces.
In short, you’ll invest once for lasting protection and safer, easier maintenance.
Durability And Longevity
Durability and longevity are the core reasons to choose garage floor paint because a tough, sealed surface resists chips, moisture, and chemicals that eat at concrete over time. You’ll see fewer repairs and longer cycles between coatings when you commit to proper prep, etching, and using a high-quality epoxy or polyurethane system.
Expect improved abrasion resistance under foot traffic, tire scrubs, and dropped tools, which translates to lower maintenance costs and steadier resale value. Choose color options that enhance visibility and reflectivity for easier cleaning and safer navigation.
Environmental impact matters too: select low-VOC products and follow proper curing and ventilation to minimize emissions. With meticulous application, you gain lasting protection, predictable performance, and a garage you won’t outgrow quickly.
Slip Resistance Benefits
Slip resistance is a standout benefit of garage floor paint, especially in sheds, cars, and workshop spaces where spills are common. You’ll notice immediate friction underfoot and on wheels, reducing slips when you step off a wet surface or move a cart.
The coating’s texture, combined with anti-slip additives, creates predictable grip without being abrasive. This safety enhancement helps you work more confidently around oil, gasoline, and water, lowering accident risk during routine tasks.
For best results, choose a product rated for interior, concrete floors and follow cure times precisely, since a compromised finish diminishes traction. Regular cleaning prevents slick residue from building up.
The Drawbacks and Trade-offs to Weigh
You’ll weigh durability trade-offs against cost and future touch-ups, since some coatings resist wear better but crack easier under heavy tools or temperature swings.
You’ll need to plan for moisture missteps—puddling, seepage, or improper sealing can undermine adhesion and invite staining or warping.
You’ll face a maintenance burden that varies by product and use, so consider routine cleaning, recoats, and inspections as part of the overall payoff.
Durability Trade-Offs
When you weigh painting a garage floor, you’ll face several durability trade-offs: coatings can scratch or chip under heavy impacts, resist wear unevenly across high-traffic zones, and lose gloss or color faster in hot sun or chemical exposure.
In practice, expect surface hardness to vary by product, with epoxies generally tougher than acrylics but more prone to UV glare and yellowing if untreated.
Epoxy alternatives can offer quick cure times, simpler re-coats, or better chemical resistance, though they may compromise long-term abrasion resistance in grit-heavy garages.
Consider aesthetic options that pair durability with upkeep: UV-stable pigments, non-slip aggregates, or satin finishes can balance looks and performance.
Plan maintenance cycles now, and align coating life with your garage’s use, tools, and schedule.
Moisture Missteps Risks
Moisture is the hidden risk behind even the best-looking garage floor coatings. When you install a coating, you must assess moisture potential beyond aesthetics. If moisture issues exist, coatings can fail prematurely, peel, or delaminate, wasting effort and money.
You’ll confront trapped dampness, rising humidity, and subfloor moisture migration that thin films can’t tolerate. Prep matters: proper moisture testing, surface drying, and vapor management aren’t optional steps; they’re prerequisites.
Waterproofing concerns extend beyond the surface layer: you may need a vapor barrier, appropriate primers, or concrete patching to prevent capillary rise from undermining adhesion. If you skip these steps, repairs become recurring costs.
Choose coatings compatible with your climate, substrate, and moisture profile, and document tests for future maintenance. Prioritize long-term integrity over short-term appearance.
Maintenance Burden Factors
Maintenance burden is real and worth weighing before you commit. You’ll face ongoing maintenance tasks, from cleaning surfaces to reapplying sealant or coating after wear. Expect occasional surface prep, especially if you notice peeling, chipping, or moisture-related issues that sneak back in.
The color and finish you choose drives upkeep: high-gloss looks reveal every smudge, while matte can hide dust but may stain more easily. Decorative options add style but complicate repairs—patching chips may require touch-ups that don’t perfectly match.
Color customization helps tailor appearance, but you’ll need to budget for periodic touch-ups as UV exposure fades hues. Plan for maintenance intervals in your project timeline, and weigh the trade-off between aesthetic goals and long-term durability.
How to Choose the Right Garage Floor Paint
Choosing the right garage floor paint starts with evaluating your space and goals: footprint area, exposure to chemicals, and how often you’ll park or walk on it. You’ll then match performance to use: abrasion resistance for driveways, chemical resistance for workshop spills, and UV stability if exposed to sunlight.
Prioritize two main criteria: adhesion to concrete and cure time that fits your schedule. Compare epoxy, acrylic, and polyurethane options based on wear layer, gloss level, and maintenance needs.
Color options matter for readability of markings and visibility of spills, while texture choices influence traction and cleaning. Consider a finish that balances ease of cleaning with glare reduction.
Choose a reputable brand, verify warranty terms, and guarantee you can apply within your available downtime.
Concrete Prep for Long-Lasting Adhesion
Before applying any floor coating, you must guarantee the concrete surface is mechanically sound and chemically ready to bond. You’ll start with a thorough assessment: check for cracks, spalling, and moisture; repair or replace damaged areas with patches designed for floor use.
Clean the slab with a degreaser to remove oils and contaminants, then etch or grind to achieve a profile that the coating can grip.
Drying time matters—wait until the surface is bone-dry before coating. Test moisture and pull-off strength as needed.
Plan color options early to ensure the coating’s primer won’t distort hues.
Consider environmental impact: choose low-VOC products and minimize waste.
Proper prep boosts adhesion, durability, and long-term performance, delivering a smoother, more reliable finish.
Step-by-Step Garage Floor Painting Process
First, you’ll start with surface preparation steps to make certain the coating bonds right and lasts. Next, apply primer and sealant to block stains and lock in moisture before the finish coat.
Finally, adhere to a steady finishing coat application routine for even color, gloss, and durability.
Surface Preparation Steps
Surface preparation is where your garage floor gains its bite: you’ll clean, repair, and level the surface so the coating sticks firmly and lasts. Begin by removing loose debris, oil, and dust with a stiff broom and vacuum.
Etch or grind the concrete as needed to open pores for better adhesion, then wipe with a damp cloth and let dry completely.
Patch cracks with patching compound, bevel edge passage, and smooth any spalling spots. Vacuum again to eliminate fine dust.
Inspect for high spots; grind them flush. Mask adjacent walls and clear floor drains.
Plan your color schemes and decorative finishes in advance, ensuring compatibility with the chosen coating.
Finally, test adhesion on a small area, adjusting prep if adhesion is weak. Proceed only when the surface is clean, dry, and even.
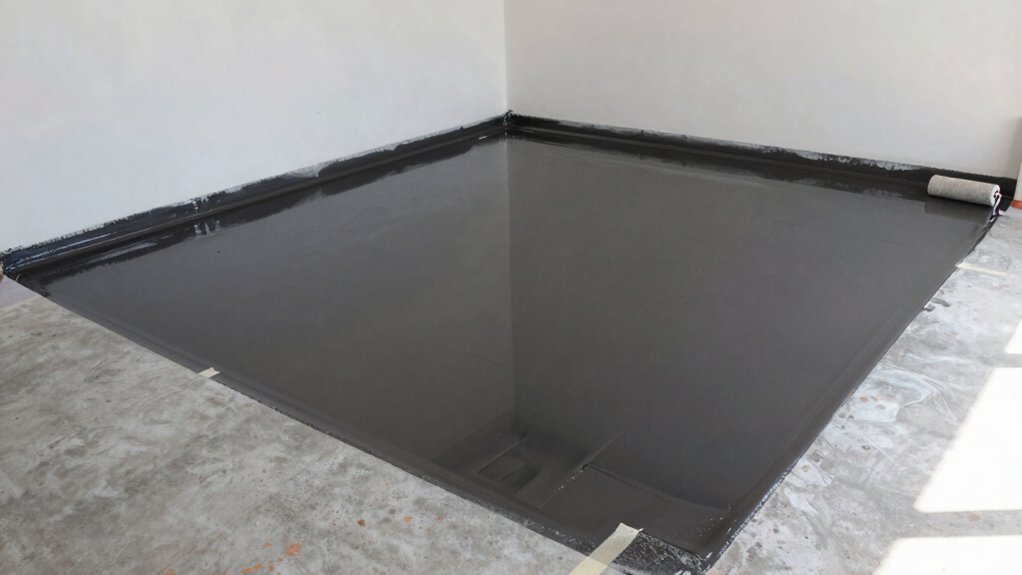
Primer And Sealant
Now that the surface is clean and smooth, you’ll apply primer and sealant to lock in the prep work and improve coating adhesion. Start with a high-adhesion primer suitable for concrete; apply evenly with a roller or brush, maintaining a thin, uniform coat. Allow the primer to cure per manufacturer specs before proceeding.
Next, sealant acts as a moisture barrier and adds leveling properties. Choose a clear or tinted sealant compatible with your later color coat. Apply with deliberate, overlapping strokes to prevent puddling. Check for pinholes and sand lightly if needed before the final coat.
Consider color options that reflect light or hide imperfections, and weigh environmental impact—opt for low-VOC products when possible to minimize odor and emissions.
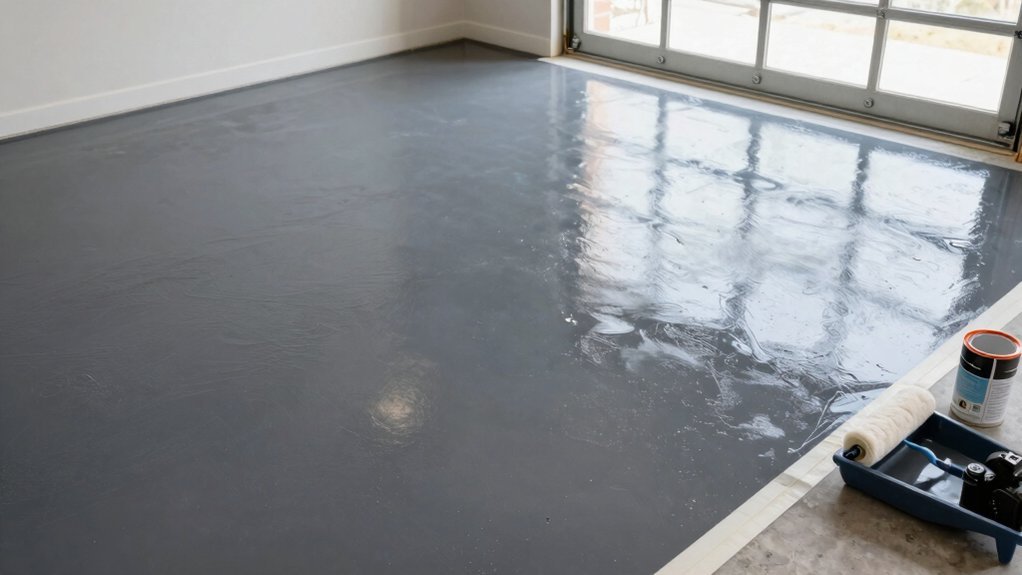
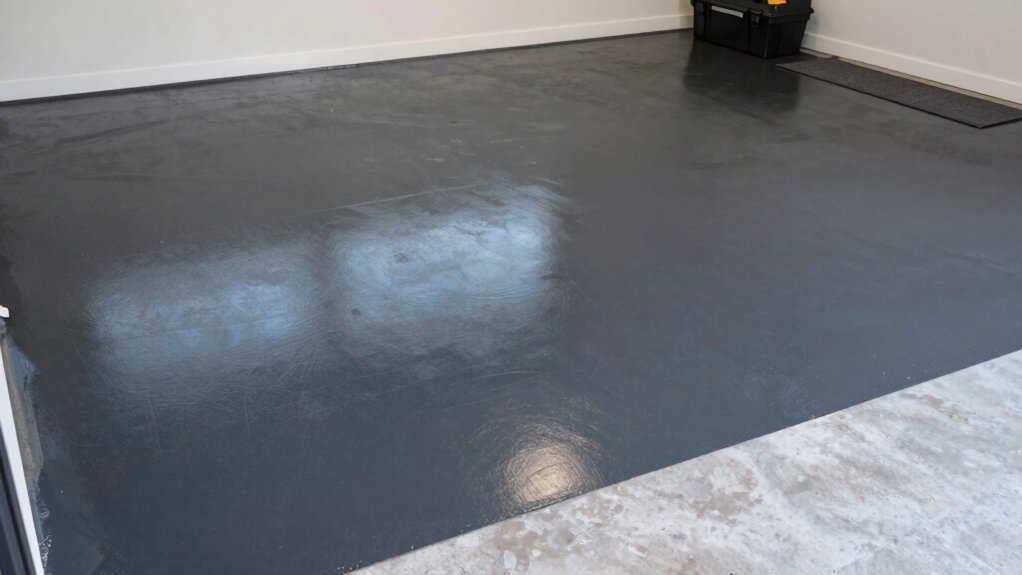
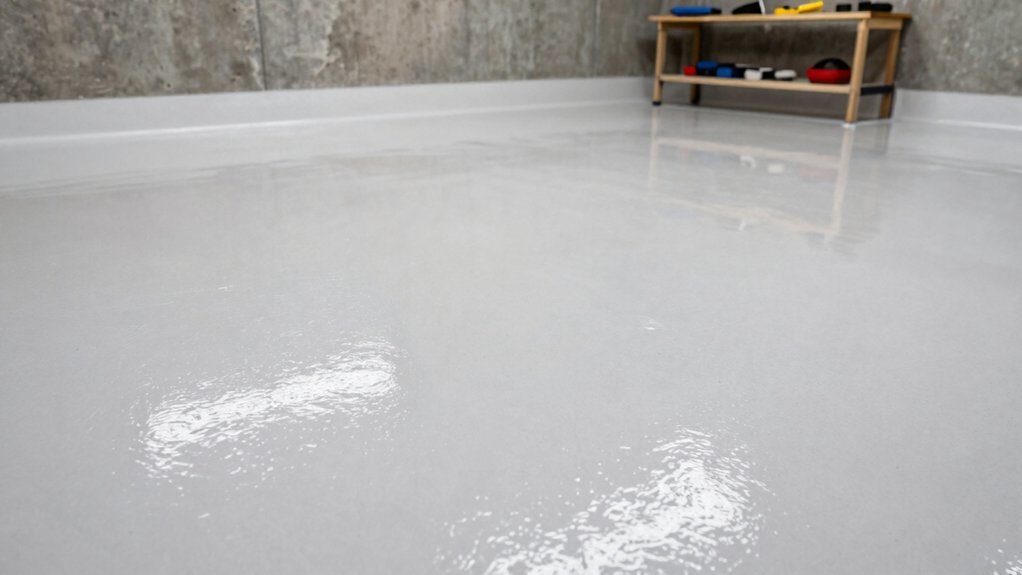
Finishing Coat Application
Have you waited for the primer and sealant to set? Now you apply the finishing coat with care to maximize durability. Begin by stirring the coating thoroughly to avoid settling. Pour a manageable amount onto the floor and spread in a continuous, even motion using a roller or squeegee, overlapping passes to prevent lap marks.
Maintain a steady cadence to avoid bubbles; back-roll any puddles for uniform thickness. Work in small sections, aligning edges with tape to keep lines clean. Consider color options and apply a second coat only if recommended by the manufacturer, ensuring adequate cure time between passes.
Before you finish, evaluate texture choices—a light texture improves slip resistance without compromising cleanability. Allow full cure before exposing floor to traffic.
Common Mistakes and How to Avoid Them
Common painting mistakes can derail a garage-floor project fast, but you can prevent them with a clear plan and careful steps.
Start with surface prep: repair cracks, clean thoroughly, and dry completely to avoid peeling. Skipping steps here leads to bond failure and costly rework.
When choosing coatings, avoid products incompatible with your concrete chemistry; read labels and select systems suited for high-traffic areas.
Thorough mixing prevents streaks and inconsistent color.
Don’t rush masking or edge work—overlap to prevent seepage and edge flaking.
Temperature and humidity matter: follow manufacturer guidelines to curb solvent entrapment and tackiness.
Plan color selection with durability in mind, opting for high-build finishes for abrasion resistance.
Consider environmental impact: choose low-VOC options and proper disposal.
Finally, test a small area before full-scale application to confirm adhesion and color accuracy.
Maintenance Tips to Extend Durability
Regular inspections and timely touch-ups keep a garage floor durable long after it’s installed. You’ll schedule quarterly sweeps to identify chips, peeling edges, or staining, then address them before moisture seeps in.
Keep a small repair kit on hand: epoxy filler, rust converter, and a topcoat compatible with your coating system. When you spot wear along door jambs or wheel tracks, recoat only those zones to preserve color depth and finish uniformity.
For best longevity, clean spills promptly with a mild degreaser and rinse; avoid harsh solvents that can dull gloss.
Maintain Garage aesthetics by tracking foot traffic and using mats at entry points. During color selection, choose a semi-gloss or satin finish for easier maintenance and higher reflectivity, improving light and perceived durability.
Cost, Budget, and ROI of Garage Floor Coatings
Garage floor coatings are an investment with clear cost, budgeting, and ROI considerations. You’ll weigh material, prep, and installation against long-term savings, resale value, and daily usability.
A practical cost analysis shows upfront costs vary by system, square footage, and prep needs, but durability reduces ongoing maintenance. ROI comes from improved aesthetics, ease of cleaning, and resistance to spills.
Plan a budget that includes contingency for substrate issues and warranty coverage. Consider concrete condition, climate, and traffic to forecast payback time. Track tangible benefits like reduced staining and extended lifespan.
For decision-making, compare options by long-term performance, not just price.
- Clear cost components: product, prep, labor, contingencies, warranty
- Short payback horizon with high-traffic spaces
- Aesthetic appeal boosts perceived value
- Longevity lowers replacement costs
- Resale and curb appeal impact ROI
Compare Coatings: Is There a Better Option for Your Space?
When choosing coatings, you’ll want to compare performance, durability, and total cost rather than just upfront price. In practice, that means evaluating substrate compatibility, cure times, and maintenance needs across options.
Epoxy alternatives often offer faster cures, lighter fumes, or easier touch-ups, but may trade long-term wear resistance or color retention. Look at scratch resistance, chemical resilience, and UV stability to forecast real-world performance in garages with tools, spills, and temperature swings.
Coating comparisons should include warranty terms, surface prep requirements, and required recoat intervals, so you don’t encounter surprise downtime.
For concrete, consider solid-color, decorative flakes, or metallic systems, then weigh ease of application against long-term durability. Choose the option that aligns with your space, use, and maintenance tolerance.
Frequently Asked Questions
How Long Will a Painted Garage Floor Realistically Last?
A painted garage floor will realistically last 3–7 years, depending on prep, traffic, and maintenance. For garage maintenance, seal cracks, clean regularly, and recoat every few years. Paint durability improves with high-quality epoxy and proper cure time.
Can I DIY or Should I Hire a Pro for Best Results?
Yes, you can DIY for good results, but hiring a pro often yields longer-lasting, even finish. Focus on thorough Garage prep, proper Paint application, cure times, and ventilation to maximize durability and minimize peeling or wear.
Will Paint Prevent Oil Stains and Chemical Spills Completely?
No, it won’t completely prevent oil stains or chemical spills. It reduces staining and cleans easier, but you’ll still see occasional marks. Use a durable epoxy, proper prep, and prompt cleanup to maximize protection and longevity.
How Does Climate Affect Paint Longevity in a Garage?
Climate affects paint longevity: harsher temps and humidity accelerate wear. You should factor in climate considerations to select durable formulas, guarantee proper curing, and vent during application. With these steps, paint durability improves and maintenance becomes predictable.
Is Epoxy or Acrylic Cheaper for My Budget?
“Truth bomb: epoxy is cheaper upfront per square foot when you factor longevity.” You weigh cost comparison and durability factors, choosing epoxy for long-term savings, or acrylic for lower upfront, quicker cure, and simpler repairs in your workshop budget.
Conclusion
So, you painted your garage floor, basking in the glow of “long-lasting durability.” Irony: you just traded a boring concrete slab for a glossy stage, only to discover that spills still happen, tires still track in grit, and resurfacing suddenly sounds reasonable. But if you want measurable protection, easier cleanup, and a change that actually lasts, you’ll appreciate the practical prep, the right coating, and the maintenance steps that keep the shine without turning your weekend into a DIY seminar.